Hardening Kubernetes workloads with the Kubescape command-line tool
Intro
Using tools such as Kubescape to help remediate security issues in your cluster is crucial to any security plan. With Kubescape, you can scan your manifests, Helm charts, or active clusters for compliance with security frameworks such as NSA, MITRE, SOC 2, and more. There are several ways to run Kubescape, including a command-line tool, an in-cluster Operator, a Visual Studio Code integration, and a GitHub action. In this guide, you will use the Kubescape command-line tool (CLI) to illustrate hardening a running Kubernetes cluster with a simple deployment. Since the Kubescape CLI is agentless, it doesn't have as much insight into the cluster as the operator does. However, it’s still a potent tool.
Deploy a Cluster
In this example, you will use a Kubernetes cluster deployed with K3s. Any cluster will do as long as it supports a local container image registry and basic Kubectl commands. If you don’t have a cluster meeting those criteria, you can set one up using the following instructions.
Install K3s
First, install K3s. Use the --write-kubeconfig-mode 644 flag to allow Kubescape and non-root users to access the Kubeconfig file without sudo. By default, the Kubeconfig file is owned by root with privileges of 600. The complete list of K3s configuration options can be found here.
Now, configure the KUBECONFIG environment variable to point to the default location of the K3s configuration:
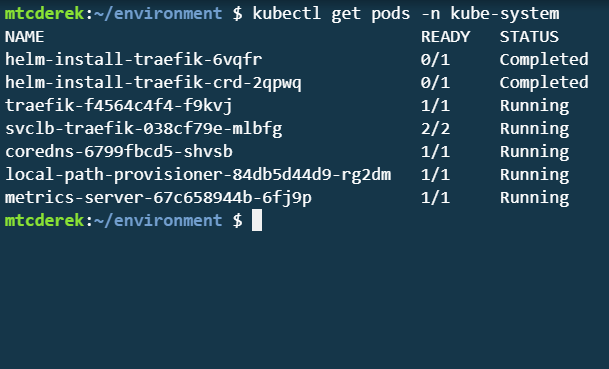
Verify the cluster is up:
Deploy a Pod
For this deployment, we will use a very simple NGINX container.
Create the Manifest
nginx-app.yml
---
apiVersion: v1
kind: Namespace
metadata:
  name: app
  labels:
    name: app
---
apiVersion: v1
kind: Pod
metadata:
  name: nginx-app
  namespace: app
spec:
  containers:
  - name: nginx
    image: nginx:1.21
    ports:
    - containerPort: 80
    imagePullPolicy: Always
    securityContext:
        privileged: true
Deploy the Pod
Deploy
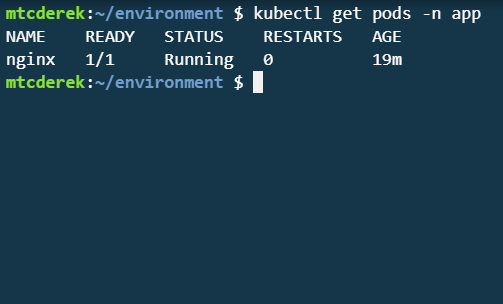
Verify
Great! Now that your cluster is set up and your pod is deployed, use Kubescape to harden it.
Use the Kubescape CLI to Detect Cluster Security Issues
Kubescape Scan
First, install Kubescape. Do so by running the script below:
Now, run the scan and view the output: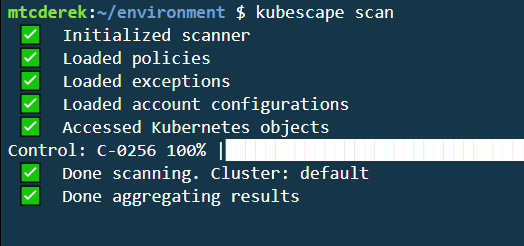
Alright, the scan is finished. There’s a lot of output to go through. Using kubescape scan without any modifiers runs a scan using the MITRE and NSA frameworks. As you scroll down, you can see several of the controls scanned and their results. At the bottom, you’ll see your overall compliance score and the highest-stakes workloads:
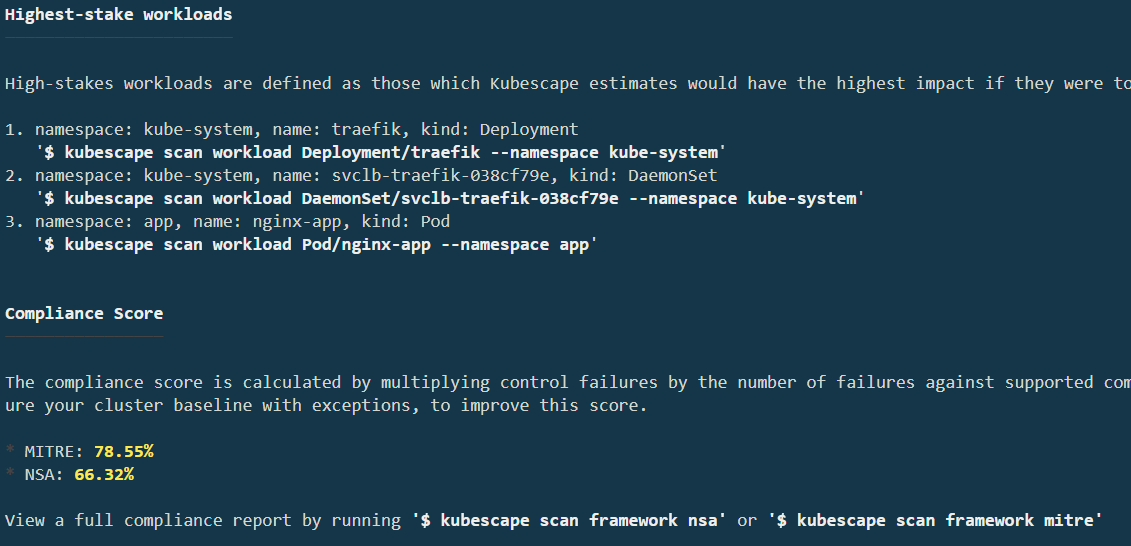
This guide will not focus on the Traefik control failures but will address the Pod/nginx-app issue soon. First, knock out one of the "Network" control failures.
Remediate a Network Control Failure
The scan results are divided into sections based on their type. If you scroll through the results, you’ll see a "Network" failure indicating that there are "Missing network policies.":

Run kubescape scan control C-0260 -v as indicated by the error, and you’ll see where the issues lie and be given more information on how to remediate them:
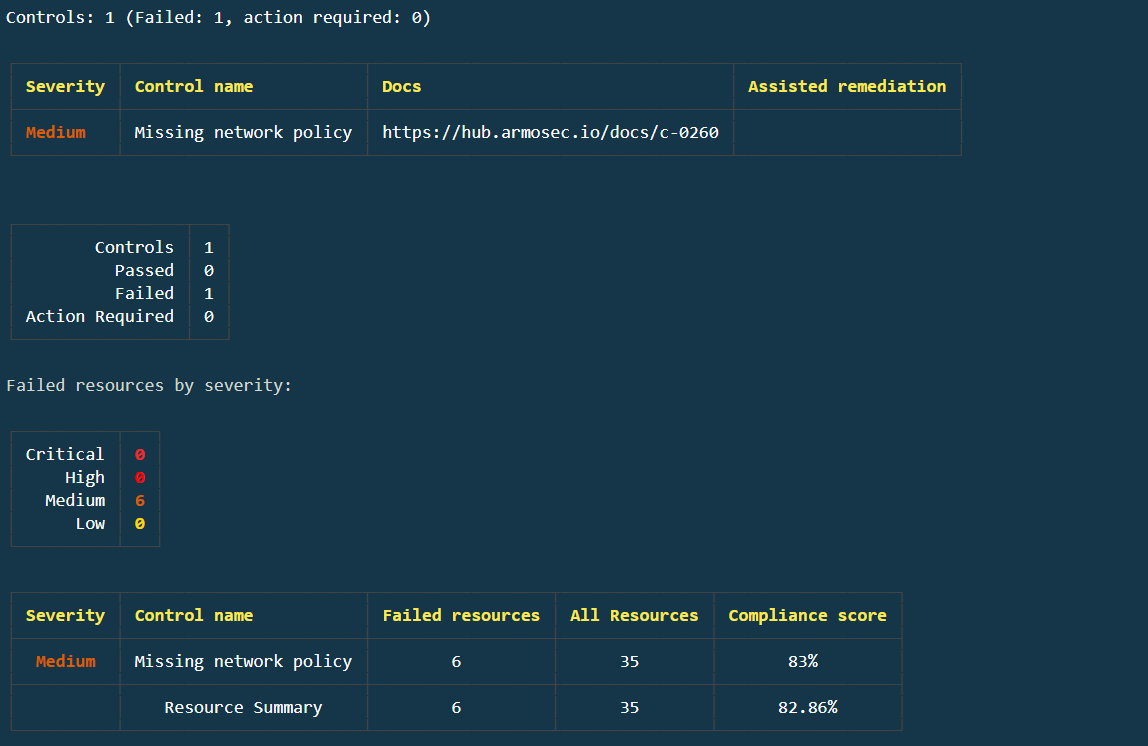
As you can see, if your terminal allows, there is a clickable link to the documentation that provides more information. In this case, it’s located at https://kubescape.io/docs/controls/c-0260/. Based on the information found in the ARMO documentation and the K3s Hardening Guide, create this network policy which will isolate network traffic within the cluster to its respective namespace:
netpol.yml
---
kind: NetworkPolicy
apiVersion: networking.k8s.io/v1
metadata:
  name: intra-namespace
  namespace: kube-system
spec:
  podSelector: {}
  ingress:
    - from:
      - namespaceSelector:
          matchLabels:
            name: kube-system
---
kind: NetworkPolicy
apiVersion: networking.k8s.io/v1
metadata:
  name: intra-namespace
  namespace: default
spec:
  podSelector: {}
  ingress:
    - from:
      - namespaceSelector:
          matchLabels:
            name: default
---
kind: NetworkPolicy
apiVersion: networking.k8s.io/v1
metadata:
  name: intra-namespace
  namespace: kube-public
spec:
  podSelector: {}
  ingress:
    - from:
      - namespaceSelector:
          matchLabels:
            name: kube-public
---
kind: NetworkPolicy
apiVersion: networking.k8s.io/v1
metadata:
  name: intra-namespace
  namespace: app
spec:
  podSelector: {}
  ingress:
    - from:
      - namespaceSelector:
          matchLabels:
            name: app
And run another scan for that control:

Perfect! You have now remediated the C-0260 control failures.
Workload Scanning
Now that you’ve knocked out a relatively simple control, look at one of the highest-stake workloads and see if fixing it can improve the score. Re-run kubescape scan, and you’ll notice the compliance score has increased by a small amount thanks to the C-0260 remediation. Now, see if fixing an issue with nginx-app can improve the score further.
Under the Highest-stake workload section, you’ll see a list of commands you can run to isolate those issues. Run the command to scan the Pod/nginx-app workload:
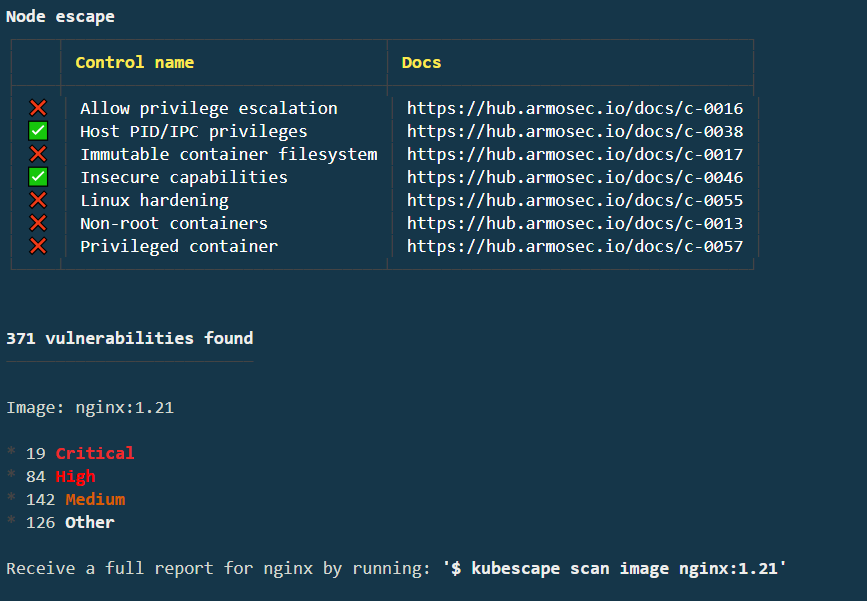
You can remediate several issues. Remediate the "Privileged container" first. If you access the C-0057 docs, you’ll see a nice remediation example. In the nginx-app.yml, you can see that our privileged attribute is set to true. Sure, this is a relatively contrived and simple example, but it’s a pretty easy fix. In your nginx-app.yml, change the privileged attribute to false:
---
apiVersion: v1
kind: Namespace
metadata:
  name: app
  labels:
    name: app
---
apiVersion: v1
kind: Pod
metadata:
  name: nginx-app
  namespace: app
spec:
  containers:
  - name: nginx-app
    image: nginx:1.21
    ports:
    - containerPort: 80
    imagePullPolicy: Always
    securityContext:
        privileged: false
Rerun the scan and you'll see that the C-0057 control is remediated as indicated by the green check:
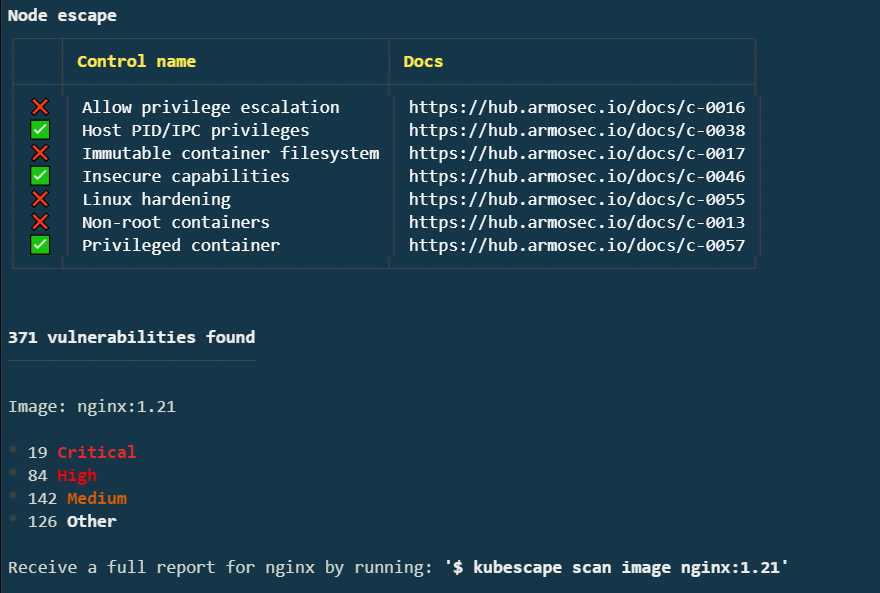
Image Scanning
For the final piece of the puzzle, scan the image and see if you can improve its security posture. At the bottom of the previous output, you should see "Receive a full report for nginx by running: $ kubescape scan image nginx:1.21". Run that command:
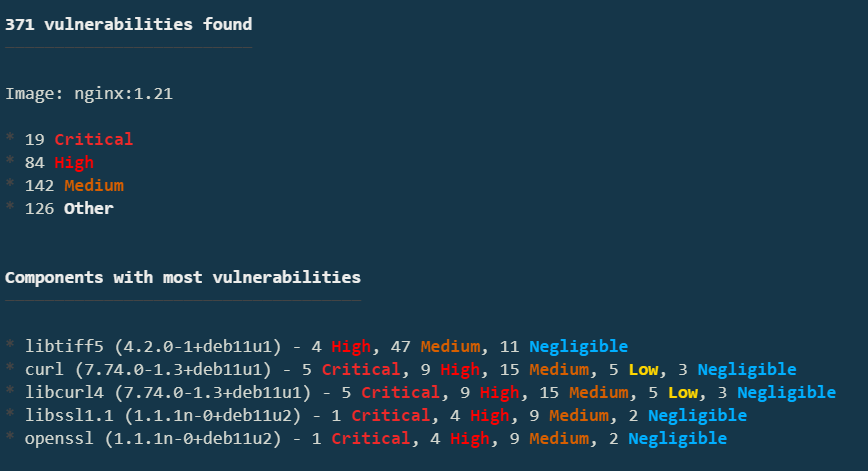
There are definitely some issues here! With some research, you’ll notice that 1.21 is not the latest version of NGINX. Upgrade your manifest to use the latest version:
After you have made the modification and saved the file, re-apply the manifest: Finally, runkubescape scan nginx:latest to see the results. The results shown in the image are current as of the writing of this guide, so yours may differ:
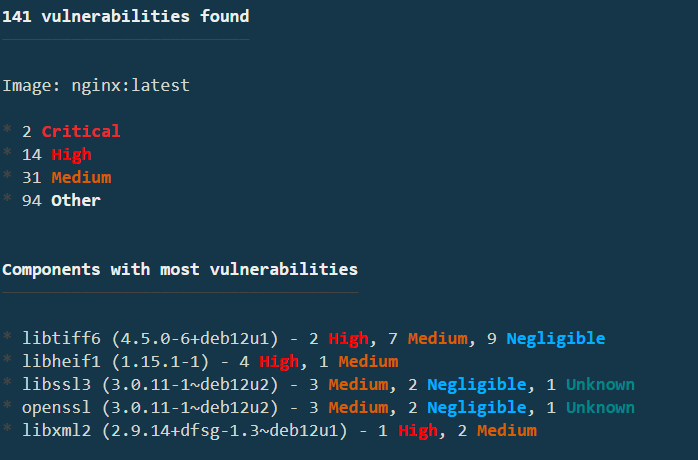
Several vulnerabilities have been remediated! Unfortunately, not all of them, but that's the nature of security, and why you need a tool such as Kubescape. Your individual results will vary due to the current version and number of open vulnerabilities in NGINX when you’re going through this guide.
Image Patching
To remediate the remaining vulnerabilities, you can also try to patch the image. Kubescape integrates with Copacetic to patch container images. To do so, run the following command:
This command will create a patched image, by updating the packages to their applicable fixed-in versions. The patched image will be tagged with the suffix-patched. You can then deploy the patched image to your cluster.
docker images
REPOSITORY              TAG               IMAGE ID       CREATED         SIZE
nginx                   latest            fffffc90d343   3 weeks ago     188MB
nginx                   latest-patched    c9b68957ce42   3 weeks ago     190MB
By default, kubescape patch loads the patched image into your local Docker image store and does not push it to the source registry. The patched tarball is streamed from BuildKit into docker load, so the docker CLI must be available on your PATH.
To push the patched image to the source registry, pass the --push flag:
For private registries, run docker login <registry> before running the command. The BuildKit pull and push path reads registry credentials from your Docker credential store. The --username and --password flags authenticate the scan and re-scan steps, not the patch export.
With --push, BuildKit uploads the patched image to the registry and does not add it to your local Docker image store.
Conclusion
In this guide, you have used Kubescape to scan a basic Kubernetes cluster for vulnerabilities, researched those vulnerabilities, and remediated them with a very straightforward process. Kubescape can also scan Helm manifests, Kustomize directories, and more. While this guide only scratches the surface, you can leverage Kubescape's CLI to harden your clusters to meet your own security requirements.